Posts Tagged ‘refraction’

Aaron was only 10 when he introduced me to WordPress and blogging. It is thanks to him that this blog ever started, so it fills me with joy to be able to blog again about another great achievement of his in the world of technology.

Now that he is 16 and in the midst of his GCSE exams, he has developed his first game for the iPhone/iPod. This was his personal project that he set himself over the Christmas holidays. He was not prompted by his ICT teacher, nor set this as a homework from school, just his own interest in coding and developing something good and rewarding.

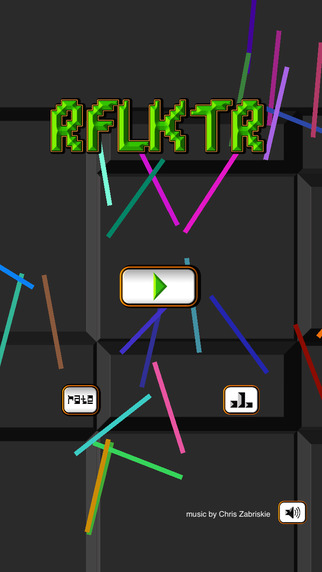
You can find his game, which is actually really good and, in my opinion, stands up there with the big viral and highly addictive games like Doodle Jump, Angry Birds and Flappy Birds, here. RFLKTR is a really engaging game that uses mirrors you draw on the screen to guide a laser beam through gaps in the walls it encounters as it travels in space. This really interesting and stimulating feature of the game, which sounds easy, but believe me it is really hard, makes it a really engaging tool for Physics teachers when teaching Reflection of light!

screen322x572

At the moment the game doesn’t seem to work on the iPad, but I am sure a later release will fix this and I would love to have other features of light that could be used to guide the laser beam across the screen. For example, it would be awesome to have blocks of glass and other materials of different refractive index appearing every now and again so that the player could move them in front of the incoming beam as well as changing their angle, so the beam can be refracted instead of reflected with these special items, etc…

Please shout out about this game and download it, because I believe learners who take their own initiative to create something like this deserve to be recognised for their effort and creativity!

When @CardiffScience posted (on Google+) a video demonstration of an arrow drawn on a piece of paper that flipped direction when seen through a glass of water I knew I had to try it myself and write this post. The video below shows the demonstration which is pretty neat, but carry on readying below the video for what I think is the explanation.

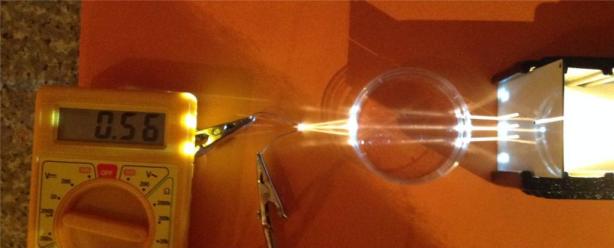
As some of you might know, I am one of the Editors of Talkphysics.org with David Cotton and he posted the below photo on this thread, which is think is a convincing explanation of what goes on in my video of the flipping arrow. glycerol_zpsee0be2d7 If you trace the path of the three rays in the Dave’s photo you can see the ray that start from the top slit from the ray box ends up at the bottom on the multimeter. This is essentially what is happening in the video, so the light reflected by the right side of the arrow gets refracted by the water inside the glass and ends up on the left when it reaches the camera. Looking at the photo above though gave me an idea, i.e. “If I go close enough to the glass I should go beyond the focal point of the glass lens and see the arrow flipping again!” – WRONG! That didn’t actually happen. However, I just noticed that Dave’s liquid was Glycerine (at least if the name of his image file tells the truth), so I wondered whether the refractive index of glycerol was such to cause less bending inside the glass, but I was wrong again. In fact, water has a refractive index of 1.33 and glycerol of about 1.47, so there should be more bending of light inside the glass. I still haven’t figured out why I can’t flip the image again if I go close enough to the glass, but I still think it was worth posting this article and if you know the answer, please leave a comment! Thanks!

It is quite amazing what you can learn by a simple visit to your old school (well I am on a Secondment, so it is still my school…). And it is quite scary, because I got this really cool demonstration by the guy who is covering me for this year and I am starting to fear they will want to get rid of me to keep him :-S

His name is Jonathan Wallace and he is an NQT at Croesyceiliog School (Cwmbran in Sunny Wales) you can contact him at jonny.wallace@live.co.uk

Anyway, have you ever seen the trick of the jelly marbles disappearing in water? Well that happens because these marbles are superabsorbent polymers that get filled with water when the come in contact with it, so when you put them into water they seem to disappear, because, being filled with water they have the same refraction index as the water surrounding them, i.e. light goes straight through them without being refracted (bent)! There is a really nice explanation of this phenomenon on Steve Spangler’s blog and you can buy these jelly marbles quite cheaply here.

But what William (Oops, I meant Jonathan) showed me a really nice twist, especially because it uses items that are a bit more familiar to the kids than some superabsorbent polymers, although they are really cool! William (Blow! I’ve done it again, I meant Jonathan) pours glycerine in a Pirex beaker and an empty (and very clean) test tube inside.

At this point you can still see the test tube inside the beaker, because the air inside the tube refracts the light going through it! But what would happen if we add Glycerine inside the test tube too?

Magic! The test tube disappears in the Glycerine! So, has the Glycerine dissolved the glass of the test tube, is it real Magic, or just another wonder of Physics? What does really happen here?

The answer is quite simple and it is very similar to the jelly marbles. The Pirex and Glycerine have the same (or at least very similar) refraction index and, therefore, light is not refracted at their boundaries and carries on through its path undisturbed by refractive effects, which means that the test tube appears to be invisible!

Thanks to William Wallace (again? Sorry, I meant Jonathan; I know it’s not funny if you are not a member of staff at Croesy, but I have to take the mick) for this great demonstration!


I am writing a series of lessons on refraction of light for National Grid for Learning Cymru (NGfL Cymru) and I needed a place to store the photos for a lesson starter activity in Wallwisher, so I thought I could write a blog about this and share the idea with all my readers. This blog post will also give you a preview of this series of resources and hopefully tickle your interest to follow up on the final product!

The idea is to create a wall on Wallwisher like this one and let the students add comments next to each of the images below to explain how the effect they see is produced. Basically like the famous placemat activity (I have attached a copy of the placemat version in Word at the bottom of this post).

I hope you will enjoy the activity with your classes and let me know how you have used it, the outcomes and any suggestions for improvement!
Download the Placemat activity in Word Refraction placemat (LS)

I saw this “Magic trick” performed as a lesson starter by one of the best Student Teachers I have ever observed, Bethan Rowland-Jones, who was at the time a Student Teacher in Swansea University. The lesson was an introduction to light aimed at an audience of yr 8 pupils and, as you can see from the video of the trick I reproduced below, she grabbed the children’s attention right from the start. The pupils were just spellbound!

This was an excellent icebreaker, especially because it generated many questions and discussions. But what is actually happening here? Well, there are a number of things that your students will notice.

First of all, while the level of water is rising the children can see the effects of light refracting from water to air, because it looks as if the coin is lifting up. However, they know this is impossible because the coin is under the glass and not in the water at all!

Then, when the water level is high enough, the coin seems to disappear. This is the effect of total internal reflection of light inside the water. At this angle the light reflected by the coin hits the walls inside the glass at an angle greater than the critical angle and it gets totally internally reflected back inside the glass. That is why we don’t see the coin anymore! What we see (at that particular angle) is the reflection of the wooden board on which the glass and coin are standing.

I cannot think of a smarter and simpler starter for this topic and I thought the lesson was outstanding!

There have been a few people who were not convinced by the TIR explanation, so I have added the video below and you can see how it works in this great simulation. The video should convince anyone, or at least any Physicist, that this cannot be explained in any other way than TIR as you get two reflections of the coin inside the tall glass. If the disappearing coin were an effect of merely refraction, we wouldn’t see any reflection inside the glass!